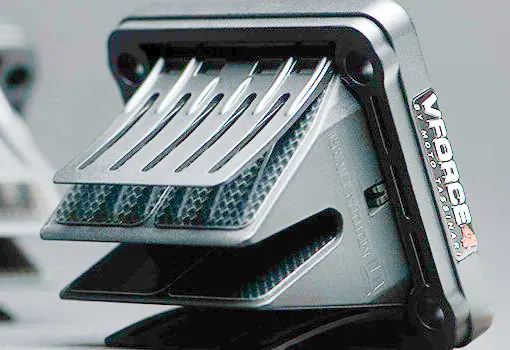
Reed Valves
Reed Valves & Modifications
Tony Doukas Racing has been Marketing reeds worldwide since 1980. We manufacture all reed valves in house on a CNC router. This allows for precise fit, close tolerances, and a smooth cross-sectional finish on the reed tips. We sell at retail, dealer level, distributor level, & to OEM manufacturers for use in the production motors and race teams since 1982. We sell reeds to over 30 different companies under private labels or brand names.
REED MATERIAL: All reed material is designed by Tony Doukas. TDR works with the material manufacturer to get the perfect combination of tension and long reed life. There are hundreds of different material combinations that can be used for reed material. Only a handful of these laminates will perform and live a long life. The balance of cloth weaves, weave directions, resin types, and resin saturation levels control the overall performance of the reed valve and engine performance. This balance takes years and thousands of dollars in testing and research. We have perfected both the material and cutting process over time to give the customer the best product available today. Below is a detailed description of all the reed material construction, cutting, and testing.
One of the greatest benefits of having a fiber reed over a steel one is that if it should ever break it will not damage the engine. This alone gives you confidence that the TDR reed will not ever harm your engine.
Cloth Weaves: The cloth weaves and the angle in which they are laid control the tension of the reed petal. The number of threads per inch do 2 things.
1: Controlling the tension of the reed. By having a thinner, closer weave cloth the tension is less. A coarser weave has a stiffer tension. A different angle of laying the cloth will also change the tension.
2: Controlling the life span of the reed. Having a finer weave cloth also has an effect on the length of time the reed will last. The finer cloth acts as a barrier for sealing of the thicker inner cloth that is the structural core. This coarser weave is the tension control and the thinner weave is the sealer ply. We use multiple layers to get the desired results.
Reed Thickness: Reed thickness in combination with the cloth weaves has a direct effect on the lifting tension of the reed petal. The reed thickness is only one of the controlling factors on how an engine performance. Altering this tension will change the characteristics of the engines powerband and performance. Although slight there is a difference. Smaller advanced engines like motocross & road race motors show these results more graphicly.
1: Thin reeds will give more bottom end power and better acceleration. This generally comes at a loss or reed life. Too thin a reed will flutter, lose top end power, crankcase pressure will fluctuate and create an unstable vacuum. As you increase the thickness and tension the top part of the power band will stabilize.
2: A middle of the road tension & thickness will give the best overall reed performance and decent reed life.
3: Thick reeds will last a long time and lose bottom end power and acceleration but have an increase of top end power at a higher RPM.
The key is to have a perfect balance of tension & reed thickness to achieve the results needed for your engine application. No two engines require the same exact reed tension. Dyno testing is only part of the overall picture and field testing being the other half. The combination of these two areas will get you the desired results.
Petal Design: Reed petal design also contributes to the overall performance in 2 different ways. Reed stability or flutter, and reed tension.
1: Reed petals are generally long and narrow. This design allows for the reed tip to flutter. Once the motor is at operating RPM’s the reeds will flutter or cycle with the intake pulses. In some applications this fluttering will interfere with the flow. On specific motors we use a wider reed by combining 2 petals to create a much more stable reed. If the reed has the same tension it will not flutter as much and speed up the velocity and increase flow.
2: Tension relief cuts and holes are used to control the lifting tension of the reed petal. This tension as mentioned before is one of the controlling factors of engine performance gains. By creating these cuts and holes at the lower portion of the reed petal the petal will open easier.
Machining Process: All TDR reeds are made by a CNC router. Using a custom cutting bit, the material is carefully machined and results in a finished edge. Waterjet, Engravers, Laser, stamping processes all leave different levels of exposed fibers and fractured resin that decreases reed life. Stamping being the worst. A superfine custom-made bit turning 28,000 rpm leaves a clean edge for longer reed life.
Reed Cage Design: I will break this into many different sectors as there are so many factors that go into a reed cage design. Here are the fields of the reed cage subject. Petal Design, Petal Material, Petal Tension, have already been explained. Cage Dimensions to Engine Requirements/Horsepower, Cage Dimensions to Carburetion size, Cage Profile Square vs Round, Cage Stuffers, Cage Overall Angle, Cage Tip Angle, Cage Tip Design, Cage Design to RPM/Flow Requirements. I will also be adding a complete dyno test results and track evaluation on the different reed valves.
Reed Petal Gap: Many times, when a reed petal is installed on a rubber coated reed cage you can not get the tip of the petal to lay flat against the cage surface. This is usually caused by the rubber over time being exposed to solvents, gasoline, etc. has caused the rubber to swell and the surface from the aluminum and the rubber is not parallel.
To verify this, remove the reed stop & petal, clean the cage, and then use a straight edge to go from the machined flat of the aluminum part of the reed cage out to the rubber area towards the tip of the cage. You will see the rubber is higher than the aluminum. The issue is the retaining screws are on the aluminum area that is lower. That higher rubber at the base or pivot area is what is causing the reed petal to have a gap at the tip of the cage.
Remedy: Remove both petals and use a flat piece of glass, glue some 180-grit wet/dry sandpaper to it. Then using water and a small amount of dishwashing soap for lubrication start slowly lapping the rubber surface until it is the same height as the aluminum. Use the straight edge to verify. Finish it off with 600 grit sandpaper to get the finer finish. Once this is done, I carefully bend the reed petal to have a slight curvature towards to cage. The reed petal will have a small 45 degree cut at the bottom right edge of the petal. That goes to the right side of the cage on install. Use the same 2 stroke oil to coat the entire cage & petal area, making sure the oil gets between the cage and reed petal. This oil is extremely important to give a proper seal and works both as a stiction factor to hold the petal seal and act as a cushion on first startup. Without the oil on a first start the reed petal is slammed hard onto the cage and will help to cause premature reed failure.
More to come soon!!
